+ Reply to Thread
Results 1 to 7 of 7

Thread: LS1 AC compressor mounting solution

  1. #1
    Join Date
    Nov 2004
    Posts
    61
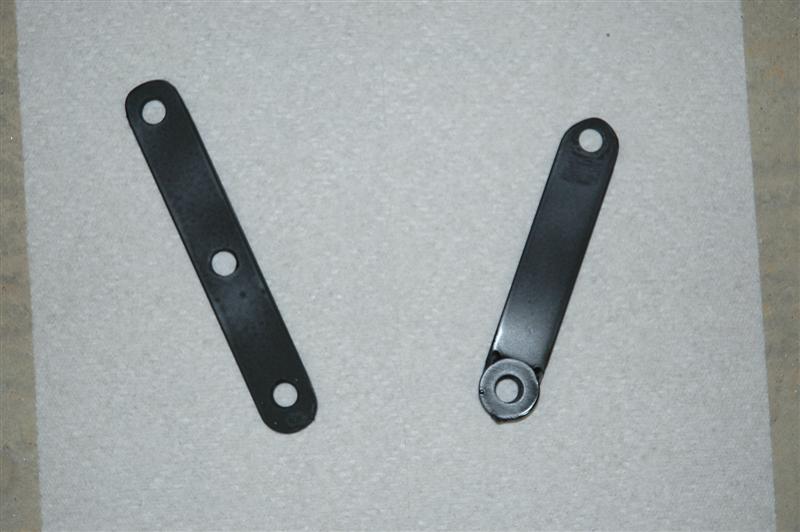
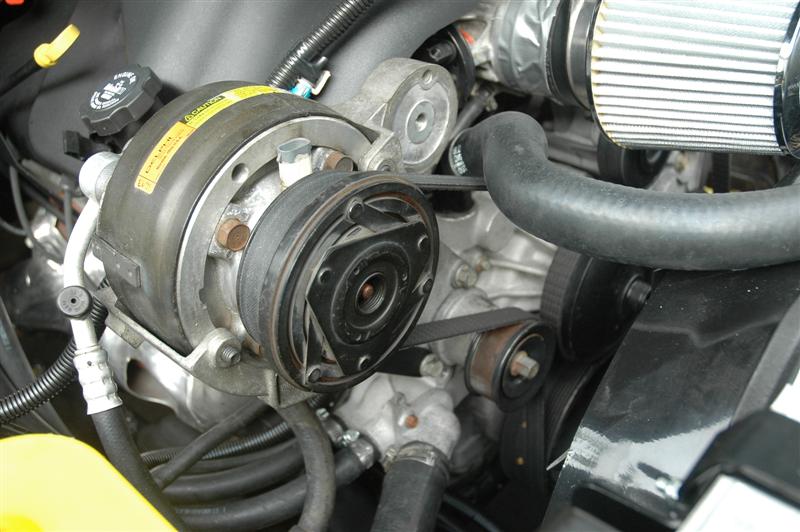
    Here is what I did to install the AC compressor on my gen III engine. I grabbed a 88-92 camaro AC compressor bracket to start and hacked the unnecessary parts (AIR pump mounting) off of that using a grinder and cutoff wheel. I then cut off the mounting points so the pulley sat the correct distance from the block. Next I built some supports using 1/4" steel barstock. They attach to tapped holes in the head and the water pump tensioner mount point.

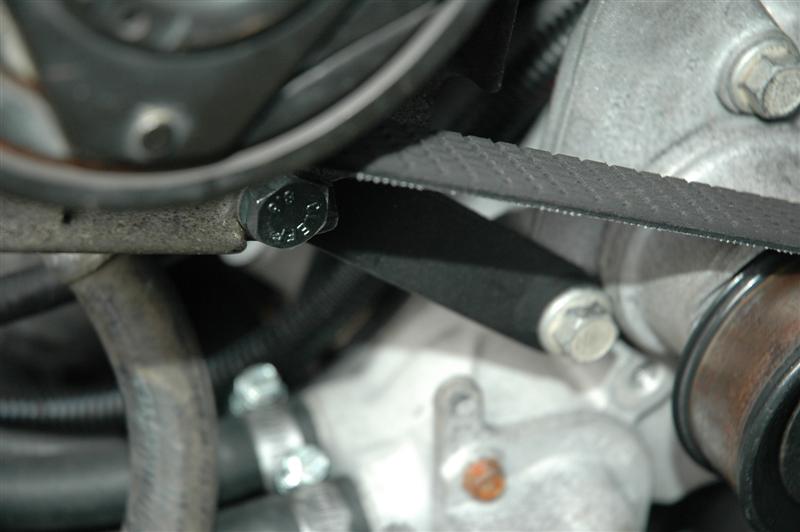
    For the tensioner I flipped the truck tensioner 180 degrees. This requires it to be mounted with only 2 bolts like the corvette tensioners are. You also must clearance the back of the tensioner with the trusty cutoff wheel and mill one of the bolt holes for the water pump to block bolts down a little bit to provide clearance. Since the truck pulley has ribs on it and with this setup the smooth side of the belt will be touching the tensioner, I used the tensioner pulley from the 88 bracket along with a small spacer to make it fit.

    Amazingly I did all this with hand tools and no mill or lathe. I did use a welder to attach some washers to one of the brackets, but that wasn't truly necessary, just makes service easier in the future.

    BTW, using the TPI camaro bracket was not my idea, I got it from someone else on this board.

    Pics:


    1995 Chevy extended cab Z71 Silverado
    2002 6L LQ9 Engine, 2001 4L80e transmission

    http://www.pswired.com

  2. #2
    Join Date
    May 2004
    Posts
    2,120
    Excellent work! PSWired, Would you mind PM'ing me you number so we can talk? I have a question about wiring for you. Is your truck a 95, or 96?


    97 GMC, 2002 LS6.

    1991 GMC Syclone #1428

  3. #3
    Join Date
    Feb 2005
    Location
    Central FL
    Posts
    109
    Great job man that looks sweet and no frame mods or high $$$ compressors and brackets. Plus it looks stock. If you got any other detailed pics could you send me or post the links .... thanks.

  4. #4
    Join Date
    Nov 2004
    Posts
    61
    I will be getting all of my pictures together eventually on my website. I'll post a link here when I do that. In the meantime there are some at http://www.pswired.com/95silverado/
    1995 Chevy extended cab Z71 Silverado
    2002 6L LQ9 Engine, 2001 4L80e transmission

    http://www.pswired.com

  5. #5
    Join Date
    Nov 2003
    Location
    Denton Texas
    Posts
    20,540
    Yeah, take it back apart and measure all your brackets so you can post it here on how to build what you did. Give us some photos of where you modified the original castings and what your new measurements are on them. I am going to be doing that conversion before long and would love to have some details.
    See my truck data in the "My Garage" section here... http://www.ls1truck.com/forums/my-ga...tml#post191709

  6. #6
    Join Date
    Nov 2004
    Posts
    61
    These pictures might also help:


    Once you get the bracket you will see where it needs to be hacked up. Also the aluminum AC lines might need some minor bending so the rubber portions aren't at tight angles.
    1995 Chevy extended cab Z71 Silverado
    2002 6L LQ9 Engine, 2001 4L80e transmission

    http://www.pswired.com

  7. #7
    Join Date
    Nov 2004
    Posts
    61
    Oh and the one problem with this setup is the belt comes close to the upper radiator hose there. I did some major hacking to that water outlet and it is shorter than it used to be, so that's one problem. If it turns out to be a problem I will either bend it up some or cut it again and reweld it at the correct angle.
    1995 Chevy extended cab Z71 Silverado
    2002 6L LQ9 Engine, 2001 4L80e transmission

    http://www.pswired.com

+ Reply to Thread

Posting Permissions

  • You may not post new threads
  • You may not post replies
  • You may not post attachments
  • You may not edit your posts