+ Reply to Thread
Page 4 of 23 FirstFirst ... 2 3 4 5 6 14 ... LastLast
Results 31 to 40 of 229

Thread: First time swap. LQ9 into 95 OBS

  1. #31
    Join Date
    Mar 2013
    Location
    Long Beach California
    Posts
    637
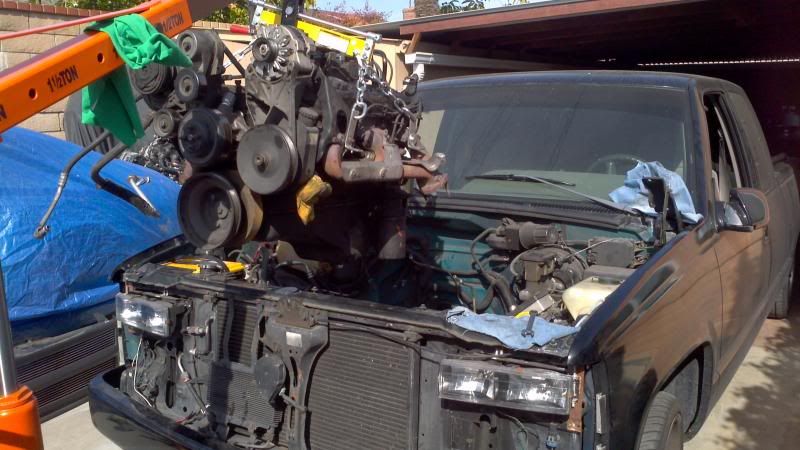
    ok well i finally got it out!!! thats a relief!! im so excited to see that tired ass thing out of there!!! heres a few pics.


    almost there!


    what a sight...

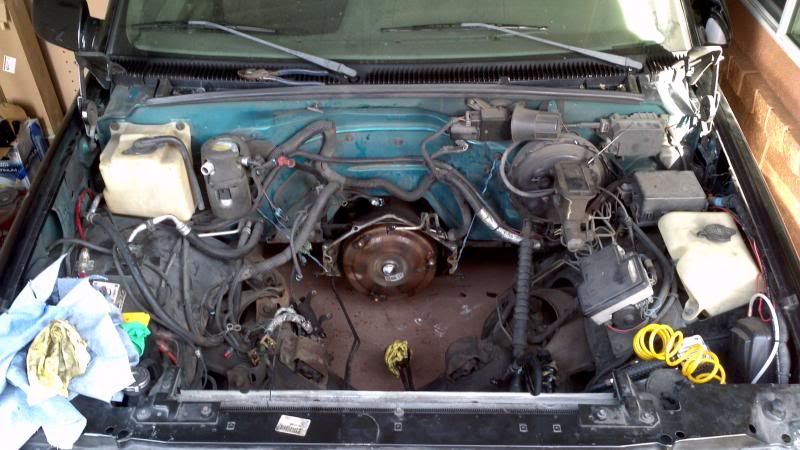
    so its out and i hopped into the bay to cover up the gas lines and getting it ready to pressure wash tomorrow. then i looked around to see what all i needed to do next and thats when the overwhelming feeling hit me.... there is a lot to do still!!! haha but ill try not to think about it and just take it one step at a time. and yes that is the original green the truck used to be. lol im sick of seeing that everytime i pop the hood so painting that is def on my list of things to do before the motor goes in!

    so mickey i got a couple questions for you since you did a similar swap. i saw in another thread that you added a presurized overflow tank. you said something about your radiator not having a pressure cap? i dont understand how not? mine does as you can see in the pic. i wont need to do that correct? and what did you do to get the oil cooler lines from the new motor to the radiator? the only thing i can think of is taking mine into a hose shop and having them crimp the new lines to my old ones. i just dont think using male-male barb fittings with clamps is strong enough/leak proof... how do i go about this?

    other than that i have a lot to keep me busy tomorrow. so ill post back tomorrow evening with whats going on.

  2. #32
    Join Date
    Sep 2012
    Location
    Quakertown, Pa.
    Posts
    363
    As for the radiator, my original radiator was smaller than the one that came from the donor truck. Since I didn't want any cooling issues, I wanted to run the biggest radiator I could. Unfortunately, the one from the donor was too shot to use, so I ordered a new radiator for a 99 Silverado 2500(donor truck). That had all the proper fittings for the oil cooler lines and trans cooler lines as well as the steam line from the throttle body. It, however, did not have the radiator cap. I had gotten the pressurized tank from the donor truck, but due differences between the OBS and NBS, there was no practical way to mount it. When I was scrounging around the junk yard, I came across this OBS diesel Suburban. It had the pressurized tank in the same location as the original overflow tank, so it was a no brainer. I also grabbed the driver's side battery box along with the radiator top brackets since the diesel ran the wider radiator. Since the donor truck had the battery mounted on the driver's side, it seemed easier to move the battery than to have to modify the harness for a passenger side battery mounting.

    Pics look good. It's a nice feeling knowing that the process has begun. But you are right, there is still a good ways to go.

    I also see that there are quite a few differences under the hood between my '93 and your '95. Basically, wiring and PCM locations along with the underhood fuse box
    .
    Last edited by Mickeymotormount; 03-27-2013 at 03:45 PM.
    '93 Chevy 1500 4X4 ECLB with a '99 Silverado LQ4 6.0 and '99 Escalade 4L60E. SOLD IT!!

    New toy: 2001 2500 HD 4X4 Extended Cab Long Bed


    John

  3. #33
    Join Date
    Mar 2013
    Location
    Long Beach California
    Posts
    637
    ok well made a lil more progress. been waking up a lil late (i like to sleep in) so thats been cutting into my time but things are going smooth tho. so thats good. im trying not to rush anything. heres a few more pics


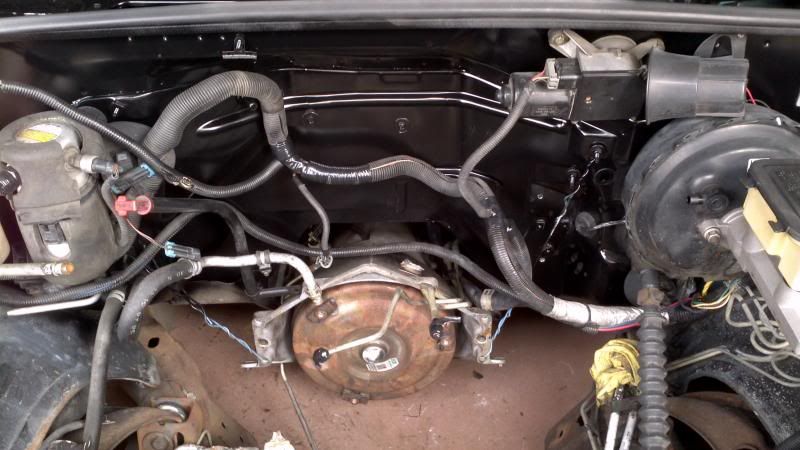
    pressure washed the engine bay which got rid of a ton of grease!!!! sanded/painted to finally get rid of all that green!!! decided not to take the time to do the frame cuz its really not that bad. just some surface rust. living in socal AND all that grease on it really prolonged its life!!! oh and i got rid of all the unused motor wires. still gotta get into the transmission branch of it.


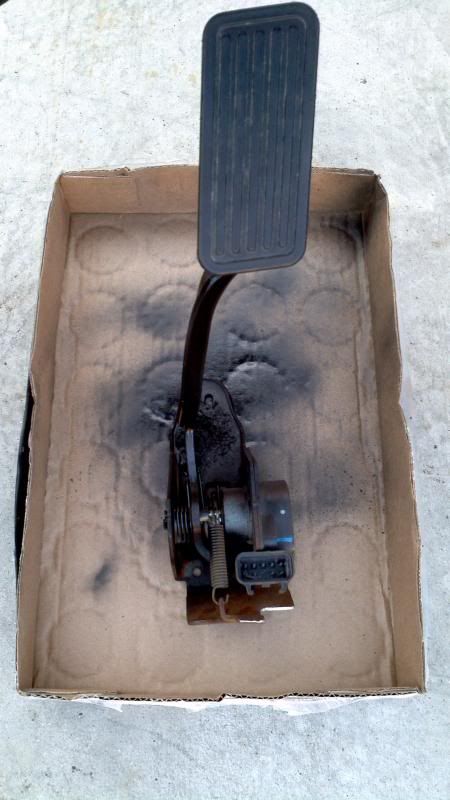
    got the pedal straightened out and painted. thats not as bad as people made it seem. torch makes things bend easy...


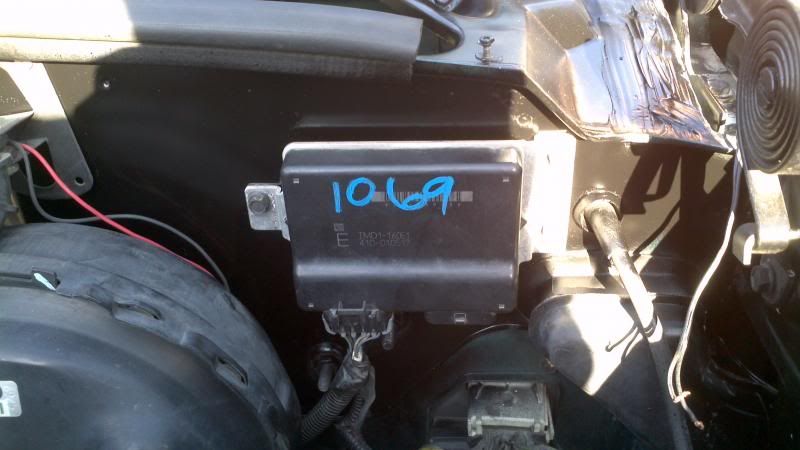
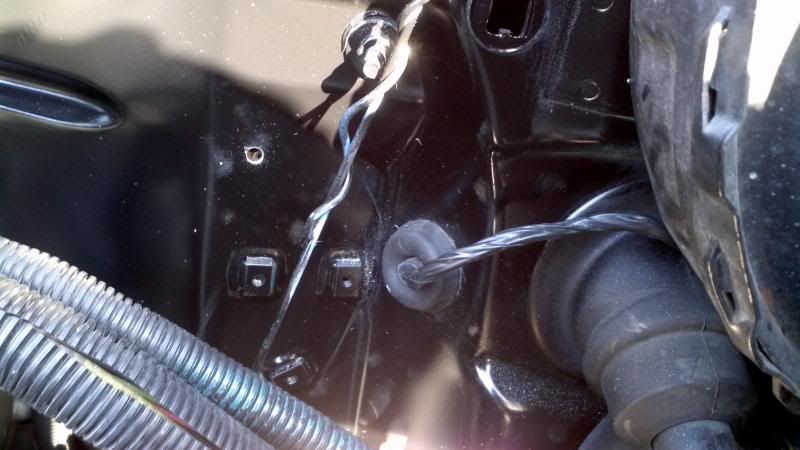
    TAC module installed and wire going inside.

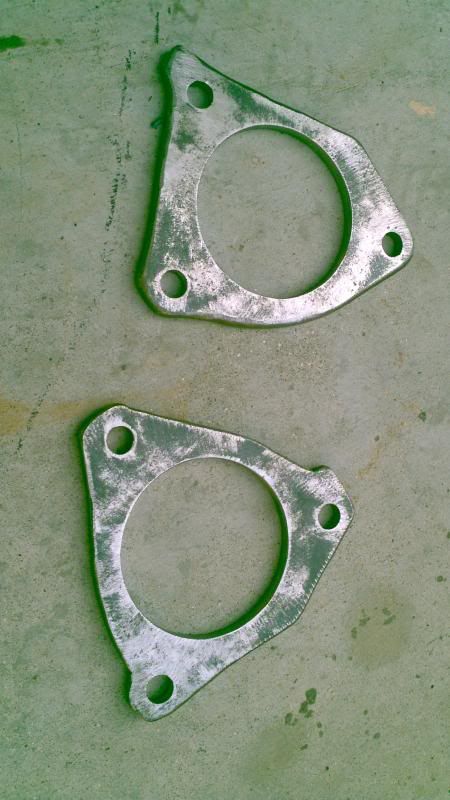
    thanks for the ebay link mikey but i found some scrap flat stock laying around so i decided to try and make them myself. took a couple hours but they turned out pretty damn good.

    thats it for now. hopefully tomorrow i can finish the wiring up.

  4. #34
    Join Date
    Mar 2013
    Location
    Long Beach California
    Posts
    637
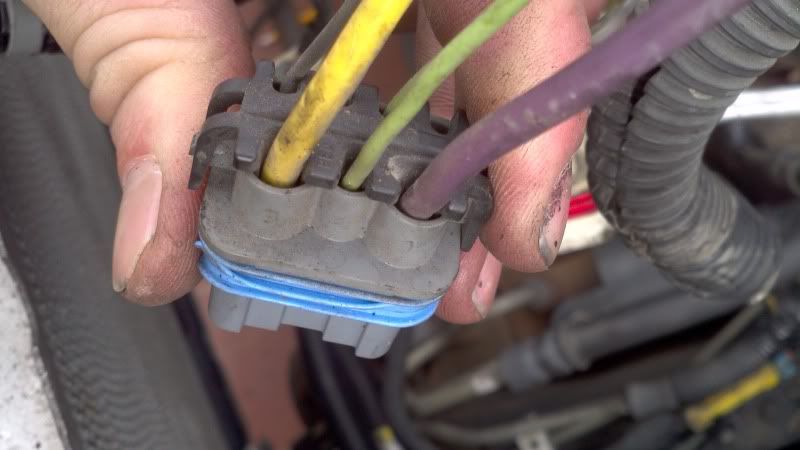
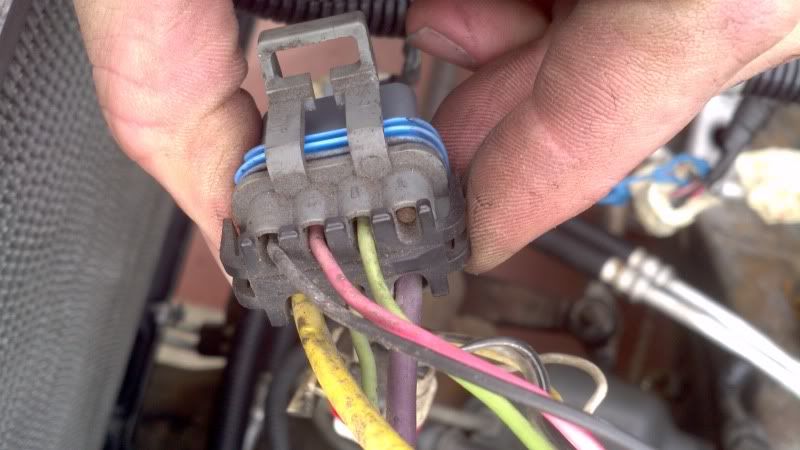
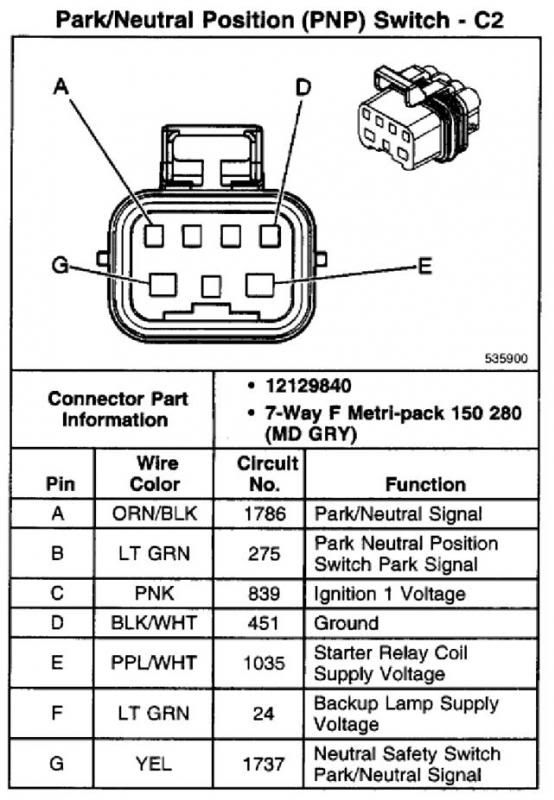
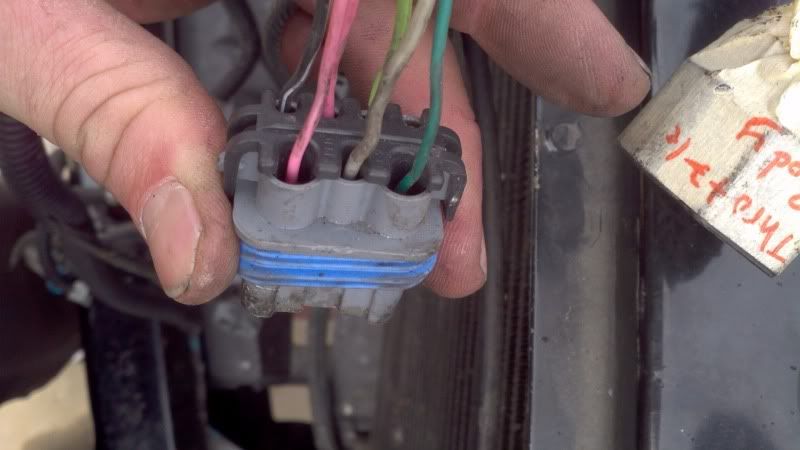
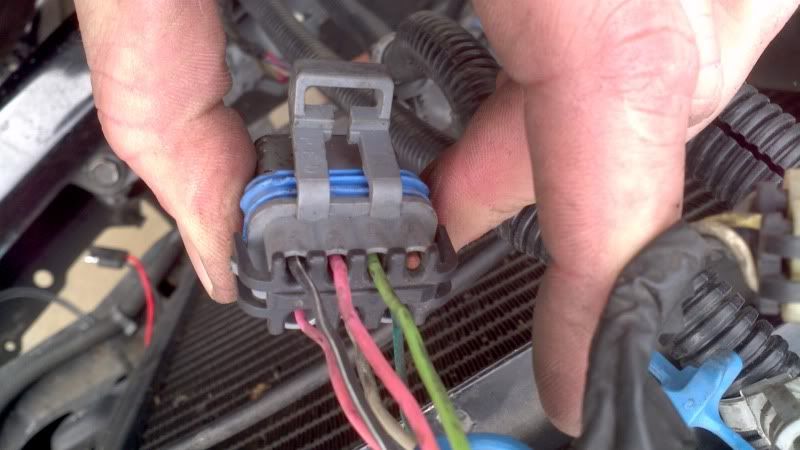
    ok so i tore into the rest of the wiring today. wow what a job that is! i wasnt as prepared as i thought i was. lol. still looking at digrams to figure the rest out. i think ill be good. got the cruise figured out. still gotta check the pins on the tranny round connector to make sure they are the same cuz one color is different. but for the flat pnp connector, the wires are a lil different. and idk what to do. ive searched thru all kinds of diagrams and keep coming up with the pinouts for my original harness. but the ones on the escalade harness are a bit different. hoping someone can clear this up. its for my original 95 4l60e. idk what was in the caddy but i do know it was awd and i think it was a 65e...


    this is my original connector and the pinout diagram matches up fine


    this is the escalade connector.

    as you can see, pins B,C,D are the same on both. but E,F,G are different. F im not too worried about as its just for reverse. but E and G are significantly diff in size. i think the purple goes directly to the starter which is understandable in why its so big. but why is the new connector using smaller wires? i dont think plugging it in will work correctly... but idk, what do you guys think?

  5. #35
    Join Date
    Sep 2012
    Location
    Quakertown, Pa.
    Posts
    363
    I don't think plugging it in will work. When I did my swap, I had 2 books with wiring diagrams to work from. One book for the '99 Silverado donor truck and one book for my '93 truck. Then I worked thru every system comparing diagrams for each system. Some systems used the same color wire and circuit number. Others required a little more figuring.

    I know this probably doesn't help much. For me, the wiring diagrams were my roadmaps to getting it done.
    '93 Chevy 1500 4X4 ECLB with a '99 Silverado LQ4 6.0 and '99 Escalade 4L60E. SOLD IT!!

    New toy: 2001 2500 HD 4X4 Extended Cab Long Bed


    John

  6. #36
    Join Date
    Mar 2013
    Location
    Mount Gambier, Australia
    Posts
    37
    +1 to above. I had both vehicle wiring printed off, and scribble everywhere. Eventually worked it out.
    1978 C20 short bed pickup, GEN111, 4L60E trans.

  7. #37
    Join Date
    Jan 2007
    Location
    Lewisville,TX
    Posts
    94
    I have a 95 and just posted this topic. I used the plug with the larger wires. Mine is missing A pin, so I ran B pin to the new PCM and the rest I had never cut.
    95 Chevy, bagged and bodied, LSx swap/detail in progress

  8. #38
    Join Date
    Mar 2013
    Location
    Long Beach California
    Posts
    637
    well i do have diagrams for both. thats how im figure this all out. but none of the ones for the 95 show anything about either of the 2 pnp conncetors. i found one diagram for the escalde that shows this connector but none of the wires are even close to being the same.


    escalde.

    you can see it at the bottom.

    i guess my only option is to trace them each out to either the pcm and/or fuse box and go from there.... but thats still only gonna get me so far.. if anyone knows, please help!

    the only thing i can think is that it might be is that ive noticed the newer trucks/vans when you turn the key to start and let go too quick, instead of the starter stopping, it seems to stay on until the motor fires. i think this might be a preventative thing for the starter not to mess up the teeth on the flywheel if you spin it again before it stops. so maybe the small wires go to the pcm and then the pcm controls the starter relay??? idk, gotta start tracing i guess but cant get back to it untill next week...

  9. #39
    Join Date
    Mar 2013
    Location
    Long Beach California
    Posts
    637
    Quote Originally Posted by dimebagged View Post
    I have a 95 and just posted this topic. I used the plug with the larger wires. Mine is missing A pin, so I ran B pin to the new PCM and the rest I had never cut.
    mine is also missing A as you can see in the pic. glad to know im not the only one seeing this. which pin on the pcm did you run it to? thanks for the heads up. do you have the link to your post?

    EDIT: nevermind, i found the post.
    Last edited by kewljay223; 03-30-2013 at 04:00 PM.

  10. #40
    Join Date
    Jan 2007
    Location
    Lewisville,TX
    Posts
    94
    I'm not sure what pin it is as I used a PSI harness and it had a wire labeled PNP.
    95 Chevy, bagged and bodied, LSx swap/detail in progress

+ Reply to Thread

Posting Permissions

  • You may not post new threads
  • You may not post replies
  • You may not post attachments
  • You may not edit your posts